Tag Archives: tool

Knowing How to Maintain Dental Handpieces

There’s many different types of dental equipment that you need at your dental practice, but there’s non more important than your dental handpiece. Every dentist is dependent on the electric handpiece in order for the practice to run smoothly. .Since it’s so versatile, the tool is also happens to be quite intricate. Proper maintenance allows the handpiece to keep running safely.

High speed handpieces are also known as drills in the dental world. This tool is a power-driven tool that has speeds of 400,000 rpm and up. The drill is of course used to drill holes for fillings and assist in other types of dental work like polishing dental trays for dentures.

Electric handpiece repair doesn’t require a complete rebuilding of the tool each and every time. Most times, the parts that are causing the issues are inspected and replaced if needed.

Sometimes, factory parts are required for a repair, other times, bearings of higher ratings can be used, depending on the state of the tool itself. Each brand and variation of handpiece has a different number of bearings and gears. That’s why you need to send your most important tool to the right repair company to ensure a safe and effective repair.

Low speed handpieces rotate at reduced speeds somewhere between 0 and 80,000 rpm, depending upon the make and model. These handpieces are equipped with a speed control ring, allowing you as the user to control the speed of the ring manually.

Understanding the different types of handpieces and the parts that are involved in maintaining them. Most dental offices use high speed handpieces more often than low speed, yet both are useful. You should expect to need your high speed handpiece maintained more often due to the wear and tear on the bearings. The type of maintenance that you perform on your handpiece will also depend on the intricate parts involved on each type of tool.
Methods For Dental Handpiece Repair

Dental handpiece repair doesn’t require a complete rebuilding of the tool each and every time. Most times, the parts that are causing the issues are inspected and replaced if needed.

Sometimes, factory parts are required for a repair, other times, bearings of higher ratings can be used, depending on the state of the tool itself. Each brand and variation of handpiece has a different number of bearings and gears. That’s why you need to send your most important tool to the right repair company to ensure a safe and effective repair.

Regular servicing of your dental handpiece is crucial to ensure a long and well-functioning operation of the tool. There are some tell tale signs that your handpiece needs more than routine servicing. We’ll explain the problems and their solutions below.

If you notice that your dental handpiece is turning slower than normal, there could be a problem with the motor. This could also be due to a lack of regular servicing of the dental handpiece on your part.

If your dental handpiece is vibrating more than usual, it could be a sign that there’s a problem with the handpiece itself. The simple solution is that you may simply just need to flush the handpiece out with oil as directed by your manufacturer. Simple lubrication can work wonders for your handpiece. Alternatively, the bearings inside of the tool could be loose.

Every dentist is dependent on the electric handpiece in order for the practice to run smoothly. Since it’s so versatile, the tool is also happens to be quite intricate. Proper maintenance allows the handpiece to keep running safely. The sterilization process is actually what has the greatest effect on the equipment itself, causing it to suffer wear and tear.

Since this tool is used repeatedly and is under a lot of stress from use, it’s susceptible to breaking more often. While your team can keep handpieces working well for longer periods of time through proper care, electric handpiece repair is always imminent at some point. It’s important that you choose the repair options that’s right for you and your dental office.

The Different Types of Dental Suction Unit

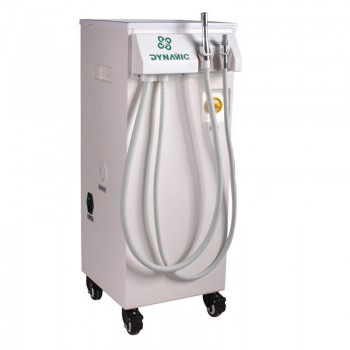
There are two main types of dental suctions unit that dentists use: the saliva ejector and the high volume suction. The saliva ejector does exactly what its name implies; it sucks saliva out of the mouth. This is the suction pictured at the upper right of this article. Many times dentists will have the patient close down on this suction so that it can suction away any remaining saliva in the patient’s mouth.

The other main type of dental suction that we use is the high volume suction. This suction is so strong that the dental assistant simply holds it close to where the dentist is working and it will suck away any nearby debris, much like a strong vacuum cleaner can suck away crumbs without actually touching them.

During some procedures, such as white fillings, it is important that the tooth stay clean and dry. The suction helps keep the tooth dry by sucking away any saliva, blood, and water that may have accumulated around the tooth. If the cavity went below the gum-line, then it’s pretty likely that the gums will bleed during the filling.

The drill that dentists use to do fillings sprays out a lot of water to keep the tooth cool and clean. Unfortunately, that water can quickly build up in the mouth and get on the dental mirror. In order to ensure that the dentist can see the tooth while working on it, it’s necessary to use the high volume suction to suck away all of that debris.

Those are the four main reasons that I came up with as to why dentists use the dental suction. In conclusion, let’s take a look at a question that I asked my dental hygienist as a child.

Keeping the patient comfortable is a high priority. In response to Jeanny’s question, we suction after giving anesthetic because the anesthetic has a bitter taste, and most patients prefer to rinse out with water and use the saliva ejector. Also, if the anesthetic sits in the back of your mouth for too long, it may start to slightly numb the back of your mouth and could give the patient a gagging sensation.

The Developments of Dental Air Polisher

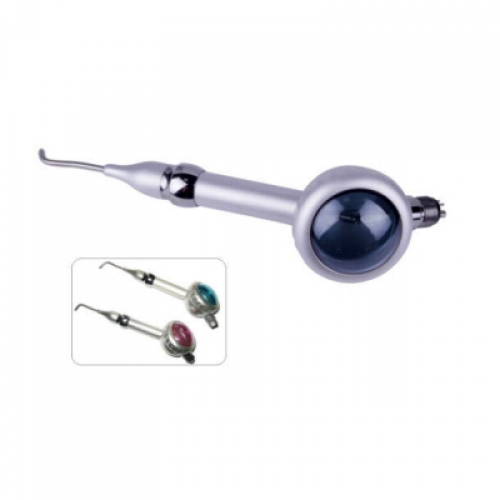
First introduced in the 1940s, dental air polisher has changed noticeably since its inception, thanks mainly to advances in materials science. Compared to polishing with a prophy cup and paste, air polishing eliminates the need for direct tooth contact or pressure against the tooth, along with any discomfort from potential heat generated with prophy cups. This technique also offers more efficient biofilm removal, easier access into pits and fissures, and a less abrasive nature than pumice or prophy pastes.

Many hygienists and dentists will be most familiar with sodium bicarbonate powder, one of the first materials introduced for use with early air polishing systems. In my experience, sodium bicarbonate has been an excellent tool for heavy stain removal, but patients react poorly to the salty taste and abrasive feel. Sodium bicarbonate powders generally have a particle size up to 250 μm, and while damage to enamel has not been reported, researchers and manufacturers warn against prolonged use on cementum, dentin, and certain restorative materials such as composites.

This means that a considerable number of patients are poor candidates for air polishing with sodium bicarbonate powder, including those with implants, restorative materials, sealants, or orthodontic appliances. Other patients contraindicated for treatment with sodium bicarbonate powder include patients on sodium-restricted diets, or those with renal diseases or hypertension.

Selective treatment with sodium bicarbonate air polishing has been a part of my hygiene routine for many years. During the last six months, though, I’ve had the opportunity to try a powder that’s new to the U.S. market. Clinpro Glycine Prophy Powder (3M) has been used successfully abroad for many years, and is now available to American dentists and hygienists. With implants in particular, I find that this type of powder is much gentler and more comfortable for patients when compared to manual scaling. Studies have proved its gentleness as compared to sodium bicarbonate, showing less surface roughness created on the titanium surface of implants.

When my patients have bridge work or pontics that are tight against the tissue, or bridge work with a great deal of recession or hard-to-access areas, I’m able to use the glycine powder to reach those difficult areas. While larger particle powders like sodium bicarbonate are contraindicated for root surface application and subgingival deposits, glycine powder is safe for use along the gingival margins and in deep subgingival pockets.

I’ve even found success using Clinpro Glycine Prophy Powder on soft tissue to break up plaque deposits. A study that compared the safety of glycine powder to sodium bicarbonate powder showed glycine to be 80% less abrasive on human root surfaces. Many air polishing units now offer specialized nozzles designed for subgingival insertion, adding to the efficacy of this technique.

For more information, please visit: https://www.alandental.com/category-88-b0-Pulse-Oximeter.html