All posts by admin_alan

Choosing Right X-ray Machine for Your Dental Practice

If you’re a dentist in 2016, you already know that investing in the right kind of digital image equipment is half the battle. In dentistry, there are two types of digital imaging systems used in intraoral radiography: computed radiography (CR) and direct radiography (DR). These are then categorized into periapical and panoramic x ray machines.

Dental radiography has evolved from film and chemical developers into a highly technical process that involves various types of dental x-ray machines, as well as powerful dental software programs to assist the dentist with image acquisition and diagnostic analysis of the acquired images. When making the decision to purchase x-ray equipment, the doctor needs to research the available options thoroughly, in order to make an informed choice for the “right” machine for his or her practice.

One type of portable dental x-ray is small, light, cordless and hand-held and can travel almost anywhere considering its compact size. This type of machine is an option for almost every patient, however, it’s especially useful for occasionally restless patients, such as young children, who require constant supervision and a quick x-ray. It can also be a better option to use in small spaces. The device works on battery so it’s important to have extras on hand in addition to a fully charged battery upon arrival regardless of where the patients are.

The other type of portable dental x-ray is one that uses a power cord and is slightly larger and heavier than the hand-held device; it’s also typically more durable. Each comes with a stand, which some dentists might find to be more comfortable and easier to use than a hand-held device. Some may also be able to operate as a hand-held device when using a stand isn’t necessary. This type is a good option for dentists who prefer to have the features of each type.

The first question that a doctor should ask themselves is, “What is the main type of treatment that I provide my patients?” If you are a general practitioner, a standard 2D panorex will provide all of the imaging requirements needed for such treatments as caries detection, diagnosis of TMJ issues, OPG images, and images of the patients entire detention in a single x-ray. Many of the newer 2D panoramic units also offer extraoral bitewing imaging capability, which allows the dentist to obtain a bitewing image without putting a sensor or periapical film inside of the patient’s mouth.

If the practice is concentrated in endodontic( Dental endo motor ) and implant treatment, then a CBCT machine is the most practical method of providing the doctor with diagnostic tools such as mandibular canal location, surgical guides, and pre-surgical treatment planning with the assistance of powerful 3D dental software applications. The patient is benefited by the reduced radiation exposure provided by these machines.
The Uses of Dental Intraoral Camera

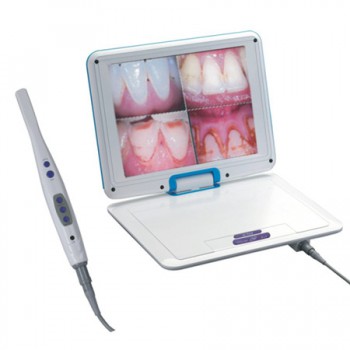
An intraoral camera is a camera which is designed to be used in the mouth for the purpose of taking video or still photography. Sometimes it is difficult for patients to fully understand the condition of their teeth in the same way the dentist does – using an intraoral camera is a state of the art dental technical device that really helps you see for yourself exactly what is happening in your mouth.

These cameras are most commonly used in dental offices, although patients can also use them at home to monitor dental health or to satisfy curiosity about what the inside of the mouth looks like. Several firms specialize in producing intraoral cameras and accessories, and others make adapters which can be used with conventional cameras so that they can be used in the mouth.

Images taken by an intraoral camera can also be reviewed later, which can be useful for a dentist who feels a nagging suspicion that something is not quite right in the mouth of a patient. The intraoral camera can also be used to document procedures for legal and educational reasons, and to create projections of a patient’s mouth which can be used in medical schools for the purpose of educating future dentists about various issues which pertain to oral health.

The intraoral camera enlarges the inside of the teeth to more than 40 times their actual size on a full color screen display. By zooming in on problem areas in affecting the teeth, dentists are capable of seeing much more than they could with the human eye alone. Often, dentists find the beginnings of periodontal disease or tooth decay that would have otherwise gone undetected if examined without the intraoral camera.

The intraoral camera is not just a diagnostic tool, but it also serves as an educational one too. In the past, dentists have struggled to explain dental decay and other health problems to patients. Most people cannot see well into their own mouths, which leaves dentists to drawing diagrams or using props to attempt to explain what is going on in the mouth of their patients.

The intraoral cameras designed for use in dental facilities come with disposable probes or probe covers to ensure that germs are not passed between patients, and they may come with a variety of options which enhance the functionality of the camera. Versions designed for home use are usually much more basic, but they can still be useful for people who want to see the inside of the mouth. Using a camera at home, someone can identify an issue which requires a dentist’s attention, keep an eye on a recovering surgical site, or teach children about the importance of oral hygiene.

The Suggestions about Buying Dental Equipment

Dental equipment are very expensive. How can we spend it value for money? Purchasing portable dental equipment for your practice can also be difficult. On average, a new dental practice will spend around $500,000 on structural upfit, equipment and supplies for their business. To make sure you are getting the most for your money, consider the following tips before diving into the world of dental equipment sales.

With so many different models and manufacturers to choose from, you want to make sure you’re investing in something of quality that is best for your practice. While some products may do the same function, some perform and last better than others simply because of how they were made.

Although “top of the line” dental chairs may cost between $7,000 to $9,000, you may benefit more from buying a used portable folding chair instead. This is because many used and portable dental chairs are made of more durable materials than many of the mass-produced products on the market now.

Before making any final decisions and purchasing dental equipment for sale, do as much research as possible on your own first. Doing so will help you understand all that the market has to offer and what your options are.

It is never a good rule of thumb to buy something simply because it is available or because it is affordable for you. Find out exactly what your practice needs and then begin your research on the quality products to invest in. This is because buying portable dental equipment is just that, an investment. Check the product’s features and confirm how it will make your practice more effective.

One of the best ways to make sure you are buying quality materials is to ask other professionals within your practice. This can come from directly contacting them or simply reading reviews from others in the industry. Make sure that the individuals you are getting advice from are also established and reputable, just as you would with choosing a manufacturer.

Those with years of experience will be able to tell you which products are best and which are not. In many cases, they have already used the product and have the best knowledge of whether it is a good investment and the pros and cons of the products.

What Should You Know of Dental Curing Light

In the dental field, a dental curing light can use ultraviolet or visible light, depending on what it is designed for. Both dentist and patient need to wear eye protection to limit damage to the retina for even the 20 seconds to a minute that the light is in use during rapid curing, and the light needs to be well maintained so that it will work properly and effectively. It’s also important to use the right curing light for the right resin product; many lights are designed to handle a range of resins safety.

Using a curing light accomplishes two things. In the first place, it makes sure that the resin cures properly and adheres evenly. When applying fillings, this is critical to keep the filling in place in the mouth. For sealants, the curing light limits the risk of cracks and other problems with the sealant. With adhesives for implants and braces, the rapid, even cure is also designed to limit problems in the future.

The dental curing light also increases patient comfort by rapidly curing resins so that the patient is not forced to sit in discomfort while the resin sets. Since the mouth usually needs to be held open wide and may be dry for the procedure, patients usually want the procedure to end as quickly as possible so that they can close their mouths and remoisturize the dried oral membranes. Using a curing light gets patients in and out of the chair quickly so that the experience of irritation and pain is limited.

The selection of a curing light that fits your style of practicing remains one of the most important dental equipment purchases you will make. If you have an active restorative practice, it is a device that you use virtually every time you treat a patient. The right light can help you achieve success, while the converse is true – the wrong light can make your efforts more tedious and your results less consistent.

Curing lights allow us to initiate the polymerization reaction “on demand” for a vast array of materials. However, there is, perhaps, more misinformation and hype regarding this type of equipment compared to just about anything else we use on a daily basis. Most of these controversies center on how long you have to cure specific types of restorations as well as how deep you can cure specific types of materials.

Manufacturers continue to make outlandish claims of their curing capabilities, most of which fall into the “too good to be true” category. An example is the claim that a new light can accomplish a “5mm depth of cure in 3 seconds”. Please don’t be fooled by these ads – you absolutely, positively cannot cure a composite in three seconds. If you undercure a restoration, for example, you may not even be aware of the negative sequelae for years. Therefore, selecting a curing light and using it properly can greatly affect the performance and longevity of your restorations.

What’s the Benefit of Efficient Dental Air Compressor

An air compressor can also function at high temperatures and in locations where explosions and fire hazards restrict other forms of energy. Air can be generated on site, so there’s more control over usage and air quality. Also, dental air compressors can run tools and equipment that generate more power than normal tools. When using pneumatic tools, an air compressor becomes a vital part of your operation.

https://www.alandental.com/Greeloy%C2%AE-Oil-Free-Mini-Air-Compressor-With-Drier-GA-61Y-637.html

The most popular compressors are positive displacement compressors, which work by filling a chamber with air and then reducing volume. Positive displacement compressors include reciprocating, rotary screw and rotary vane compressors. Although reciprocating compressors are the most widely available on the market, rotary compressors are most useful in industrial environments.

Studies have concluded that industrial plants waste roughly 30 percent of generated compressed air, which could equate to $9,600 for a typical scfm installation, or as much as $32,100 for 1,500 CFM. Estimates also indicate that poorly designed compressed air systems in the U.S. result in wasted utility payments of up to $3.2 billion.

Energy efficient air compressors will not only save money but will also help control pollution. A walk-through assessment can help identify conservation opportunities in your compressed air system.

Large-scale air emissions are released when electricity is produced. Reducing the electricity needed for compressed air systems can help significantly improve air quality.

Many industrial compressors use oil for lubrication, creating an oil and water mixture called condensate, which contains hydrocarbons and other harmful contaminants that require proper disposal in accordance with government guidelines. Oil water separators, used in condensate management systems, can help efficiently remove waste. An outside waste management company can help dispose of compressor condensate.

The largest cause of energy waste results from unused, or leaked, compressed air. Heat loss is also a large component of wasted energy in the air compression process. With energy costs doubling in the last five years, it couldn’t be more crucial to make your compressor more energy efficient.

The cleaner the air your compressor creates and uses, the safer your patients. In a dental practice, there is the risk of exposure to bacteria, microorganisms and pathogens. When equipment is producing poor-quality air, or it’s improperly generating a moist environment in machine parts, you could be creating a breeding ground for these dangers.

How to Do the Sterilization

Steam dental autoclaves are the most commonly used type of heat sterilizer in dental practices. Two types of processes employ steam under pressure. The difference between the two is the manner in which the machine evacuates the air from the sterilization chamber and then introduces the steam.

Gravity displacement sterilizers rely on the forces of gravity to force air out of the chamber through air escape vents. The steam entering the chamber from the water reservoir displaces the air as it leaves the chamber. The combination of pressurization of the chamber, steam and a high temperature for a prolonged period has the ability to kill virtually all microorganisms. This is the most common type of autoclave found in dental offices in the United States. A typical cycle for wrapped instruments includes heat-up and pressurization time, followed by a 15-to-30-minute cycle during which sterilization is taking place (121°C at 15 psi). The sterilization cycle time decreases as the temperature is increased.

It is important to use cycle times and temperatures described in the owner’s manual, and never to interrupt the sterilization cycle to remove or add items, or for any other reason. Interruption of the cycle will result in instruments that are not sterile and therefore not safe for use on patients. After the sterilization cycle, the sterilizer must depressurize and the packs remain in the sterilizer for drying. The drying phase may take anywhere from 20-45 minutes. The unit must only be opened after completion of the drying cycle. Upon removal from the sterilizer, sterile packs must be stored in a clean, dry area. Packs that become wet, torn, contaminated, or otherwise compromised require resterilization.

Dry-heat sterilization employs high temperatures for extended periods to achieve sterilization of dental equipment. The method of heat circulation in dry-heat sterilizers is usually convection, which helps to ensure that the heat circulates throughout the sterilization chamber during the process. Mechanical convection is more effective; the sterilizer contains a fan or blower that continually circulates the heated air to maintain a uniform temperature throughout the chamber. Most commercially available dry-heat sterilizers on the market today are of this type.

The higher temperature of a dry-heat sterilizer means that paper will scorch and plastic will melt. Specialized packaging material is available for dry-heat sterilizers. Most handpieces will not tolerate the higher temperatures of a dry-heat sterilizer. Mechanically driven handpieces that contain turbines and bearings are susceptible to damage at higher temperatures. The manufacturer’s instructions should be checked for compatibility of instruments, devices, and materials with the unit and the handpiece manufacturer’s instructions should be followed for preparation of the handpiece prior to sterilization and for sterilization itself.

The Developments of Dental Air Polisher

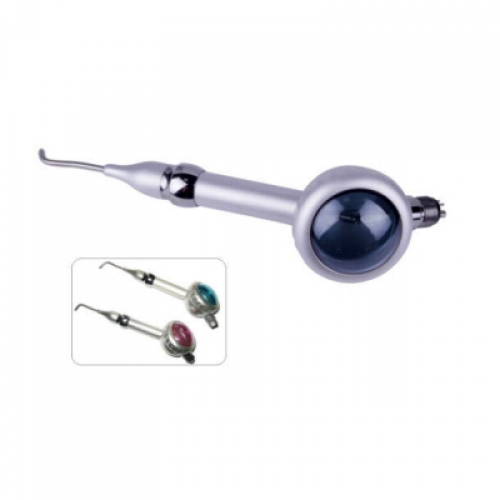
First introduced in the 1940s, dental air polisher has changed noticeably since its inception, thanks mainly to advances in materials science. Compared to polishing with a prophy cup and paste, air polishing eliminates the need for direct tooth contact or pressure against the tooth, along with any discomfort from potential heat generated with prophy cups. This technique also offers more efficient biofilm removal, easier access into pits and fissures, and a less abrasive nature than pumice or prophy pastes.

Many hygienists and dentists will be most familiar with sodium bicarbonate powder, one of the first materials introduced for use with early air polishing systems. In my experience, sodium bicarbonate has been an excellent tool for heavy stain removal, but patients react poorly to the salty taste and abrasive feel. Sodium bicarbonate powders generally have a particle size up to 250 μm, and while damage to enamel has not been reported, researchers and manufacturers warn against prolonged use on cementum, dentin, and certain restorative materials such as composites.

This means that a considerable number of patients are poor candidates for air polishing with sodium bicarbonate powder, including those with implants, restorative materials, sealants, or orthodontic appliances. Other patients contraindicated for treatment with sodium bicarbonate powder include patients on sodium-restricted diets, or those with renal diseases or hypertension.

Selective treatment with sodium bicarbonate air polishing has been a part of my hygiene routine for many years. During the last six months, though, I’ve had the opportunity to try a powder that’s new to the U.S. market. Clinpro Glycine Prophy Powder (3M) has been used successfully abroad for many years, and is now available to American dentists and hygienists. With implants in particular, I find that this type of powder is much gentler and more comfortable for patients when compared to manual scaling. Studies have proved its gentleness as compared to sodium bicarbonate, showing less surface roughness created on the titanium surface of implants.

When my patients have bridge work or pontics that are tight against the tissue, or bridge work with a great deal of recession or hard-to-access areas, I’m able to use the glycine powder to reach those difficult areas. While larger particle powders like sodium bicarbonate are contraindicated for root surface application and subgingival deposits, glycine powder is safe for use along the gingival margins and in deep subgingival pockets.

I’ve even found success using Clinpro Glycine Prophy Powder on soft tissue to break up plaque deposits. A study that compared the safety of glycine powder to sodium bicarbonate powder showed glycine to be 80% less abrasive on human root surfaces. Many air polishing units now offer specialized nozzles designed for subgingival insertion, adding to the efficacy of this technique.

For more information, please visit: https://www.alandental.com/category-88-b0-Pulse-Oximeter.html

How Can You Save Money on Dental Equipment

Operating a successful dental practice is not exactly cheap, but there is a litany of ways that you can save money along the way. Find a trusted dental equipment resource online and stop overspending for important equipment.

Finding the best equipment possible should be your top priority, you also need to consider the financial impact of these investments. Here are three important pieces of dental equipment that you should never overspend on:

One of the biggest expenses you will incur as a dentist is the money you spend on replacement parts. From compressor parts to dental bulbs, you’ll find yourself in need of replacement equipment on a weekly basis. About 74% of adults believe an unattractive smile can hurt their success, and showing your patients “unattractive” and worn-down equipment will certainly hurt your success moving forward. Always try to keep these replacement parts as new as possible without exceeding your budget.

Dental autoclaves are truly the backbone of any dental office, and you cannot work safely without them. All of your handheld tools need to be sterilized before they can be used, and you can end up spending way too much on these devices if you invest in a lower-tier product that constantly needs to be replaced. Searching online will allow you to find dental autoclaves that suit your specific needs, including automatic autoclaves, manual devices, and chemical autoclaves.

Dental cone beams are a fairly new technology that has revolutionized the way that dentists can treat their patients. When regular facial x rays are not sufficient, you need an advanced tool that will allow you to diagnose urgent dental issues. There are two types of digital imaging systems used in intraoral radiography(intraoral camera) — computed radiography (CR) and direct radiography (DR). Purchasing dental cone beams online enables you to pick the machine that is right for your practice and avoid the dreaded “buyer’s remorse.”

Opening a dental practice is not an inexpensive task, and you’ll find yourself spending more and more money over time to sustain your success. Therefore, you should always be on the lookout for high-quality equipment at an affordable price.

The Way to Replace Parts of Dental Sterilizer

Autoclave sterilizers have been known to play a significant role in the daily functioning of dental operatories and are recently becoming even more advanced and efficient due to advances in technology. Development of a new generation of autoclaves within the last two decades has added a new dimension to this heat sterilization modality. These autoclaves are classified as “Class B” sterilizers or “pre- and post-vacuum” steam sterilizers. The equipment is fitted with a pump that creates an initial vacuum in the chamber to ensure air is removed from the sterilizing chamber before steam enters.

The latest innovations allow for fast and easy use for efficient instrument processing, reliability and effectiveness for infection control assurance, automatic opening door for efficient instrument drying, and maximum space utilization and a complimentary design for your sterilization area. Although these sterilizers can be a somewhat costly addition to a dental operatory, the time and money that they save dentists down the road is substantial. Taking a few pointers into consideration and performing routine checks and replacing old parts on your unit can help maximize the life and functioning of your model.

Door Gasket: To replace the door gasket, begin by simply removing the old door gasket. Clean the gasket groove in the door, and chamber face. For easy installation of the new gasket, use the “South-East-West-North” method (i.e. begin installing the gasket at the bottom of the door, then install the left and right sides and finishing at the top by squeezing in any of the excess making sure that the gasket fits flush).

Dam Gasket: Use CAUTION when removing or installing the dam gasket –the door studs can be sharp. To install the door dam, align and place the dam gasket on and over the door studs. The dam must lie flat against the door (refer to the Installation Instructions included with the MIG035 dam gasket).

Chamber & Vent Filters (mesh style filter): If the machine has both a Chamber and a Vent Filter – Remove all trays and the rack from the chamber. Clean the chamber, then remove the chamber filter. Install the new filter. You must also replace the Vent Filter that serves as a filter for the steam trap/bellows and is located in the vent line to the tee fitting. Reinstall rack and trays.

Sterilizer: After replacing the PM parts, check the reservoir and clean if dirt or debris are present (Note: Debris is the number one reason for Steam Trap/Bellows failure). Refill reservoir with distilled water only. Conduct a temperature check using a Max Register Thermometer. Conduct a pressure check to identify any leaks that may need to be addressed. If calibration is necessary, use the RPI Pressure Gauge and the RPI Trim Pot Tool.

Debunking Common Dental Implant Myths

A dental implants treatment is for individuals who have a missing tooth or teeth. They are also for those who need support for a bridge or a denture. The most common reason though is to replace a missing tooth or teeth, permanently. Dental implants are artificial teeth that are surgically implanted in the mouth in place of missing teeth, teeth that need to be removed due to decay or irreparable disfigurement.

While dental implants are impervious to tooth decay, you’re still prone to gum disease. That’s why you need to brush, floss and visit your dentist regularly. There are some additional steps that you should take keep your new teeth just as dazzling as your original pearly whites.

See your dental specialist twice a year. Not only will she thoroughly clean your implants and remove plaque, but a cosmetic dentist in New Jersey can evaluate if your implants need adjustments.

Getting dental implants does not reduce or eliminate your risk for oral disease. In fact, as you age developing root decay and mouth cancers naturally increase, no matter how often you brush and floss. That’s why it’s crucial to get regular checkups. When you visit your oral hygienist in New Jersey or surrounding location for cleanings and dental implant maintenance, he will also evaluate your mouth for these potential health problems:

Uneven jaw bone caused by tooth loss (since you have implants, you’re at risk for this)
Tissue inflammation – an oral problem people with dental work are at higher risk for Attrition, a structural problem caused by forces from other teeth.

Regardless of whether you have all your original teeth or dental implants, everyone should practice proper oral hygiene. The great news is that by following these simple recommendations, your dental implants can last for over four decades.

Since a dental implants treatment is most commonly used to permanently replace a missing tooth and is performed by a cosmetic dentist, many would think that one has it just for an aesthetic appeal. This isn’t always the case, even though the patient may not be aware of the dental health improvement that an implant treatment has, it does have it.

When a person is missing a tooth, the gap that’s left in their mouth enables the rest of the teeth to shift and move which can cause misalignment, a poor bite, and effect their eating habits. The bone, which will weaken more quickly, where the tooth is missing if the gap isn’t filled. This can cause the other teeth to become loose and fall out.

For more information, please visit: https://www.alandental.com/category-80-b0-Root-Canal-Endodontic.html